Supplemental menu of Kendal diamond microdermabrasion
system HB-SF03
To help users to operate Kendal diamond
microdermabrasion system HB-SF03 well, we set up this online manual.
-
In this online manual,
we instruct users how to set up the system.
-
Operation instruction
of diamond microdermabrasion.
-
Operation instruction
of vacuum use.
1. Instruction to set up the system
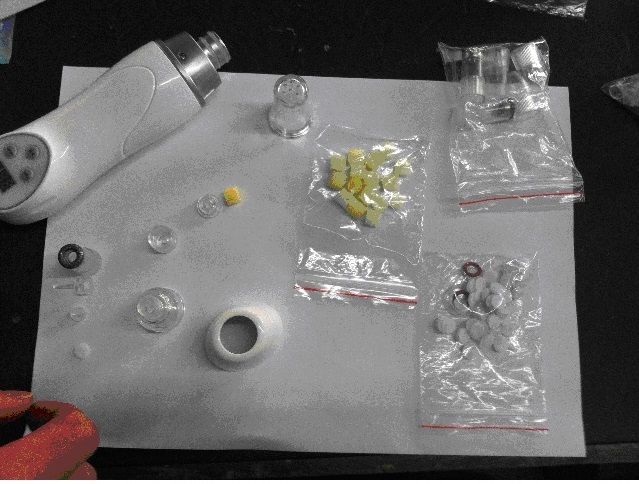
The following picture 1 shows all accessories in the
package.
Please note that the system comes with partial assembly
(Step 1 to Step 5 have been finished in the factory).
You just need go to Step 6 directly to install either
diamond tips or vacuum ventouses. In the future, if you need to replace
the sponge filters, you can do that according to the Step 1 to Step 10.
Picture 1
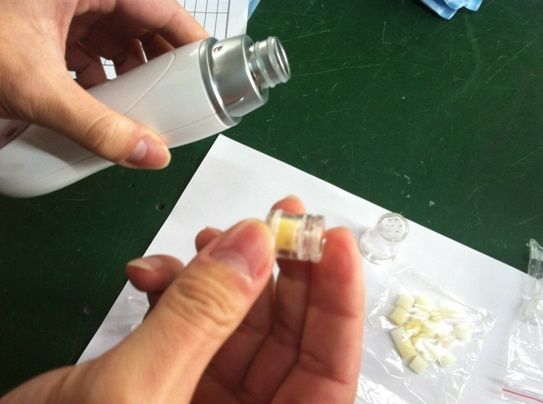
Step 1: Put the sponge filter into its container.

Step 2: Close that small filter container with its cap.

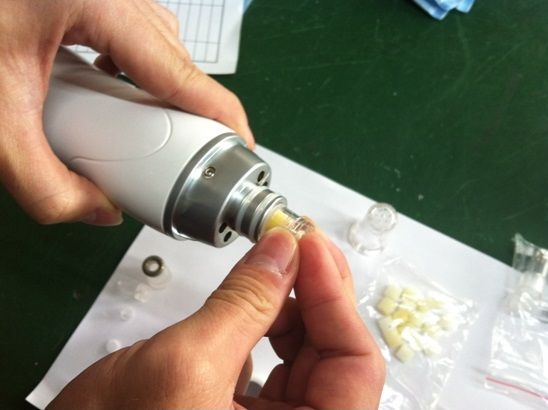
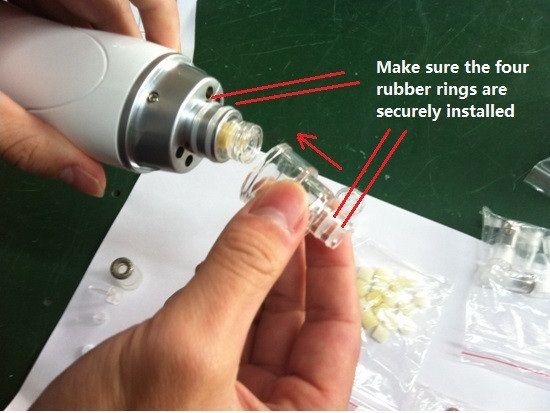
Step 3: Install that filter container
Step4:
Step 5:
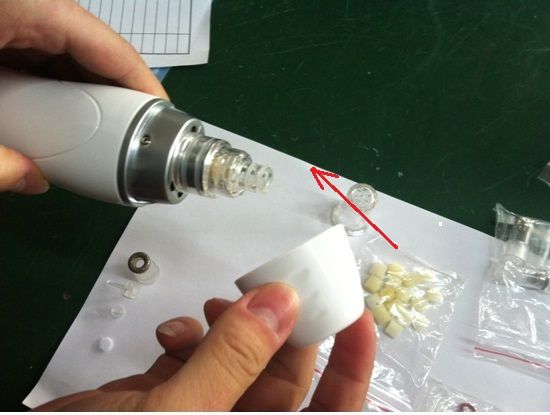
Step 6: Put cotton filter B into small container A
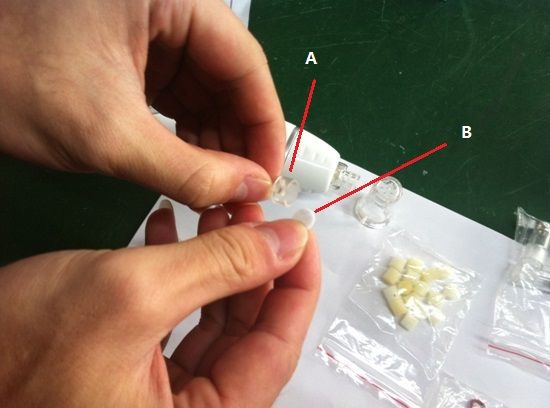
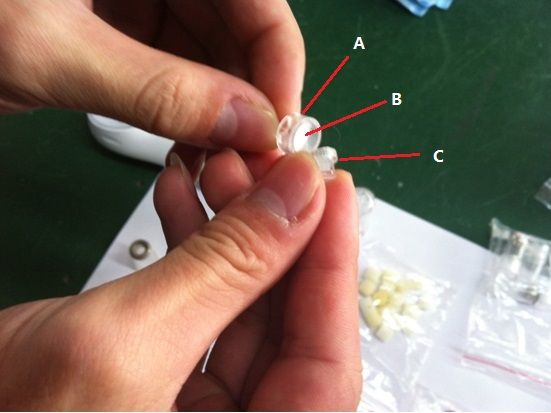
Step 7: Put in small cylinder piece C so that cotton filter B is between
A and C.
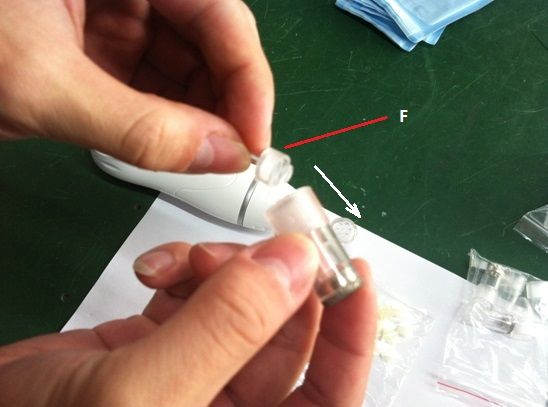
Step 8: Put the whole piece of F into diamond tips or
vacuum ventouse
Step 9: Install the diamond tip or vacuum ventouse
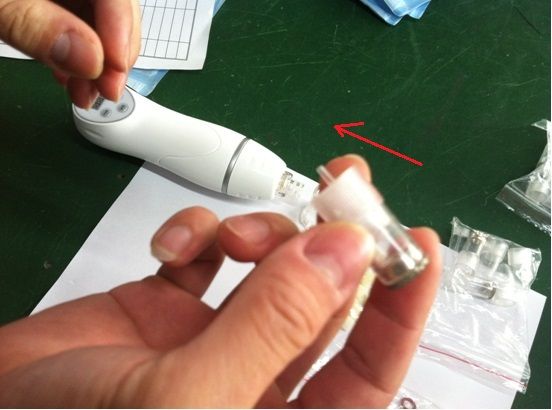
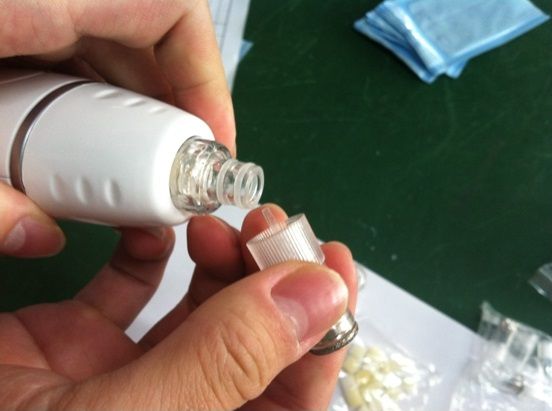
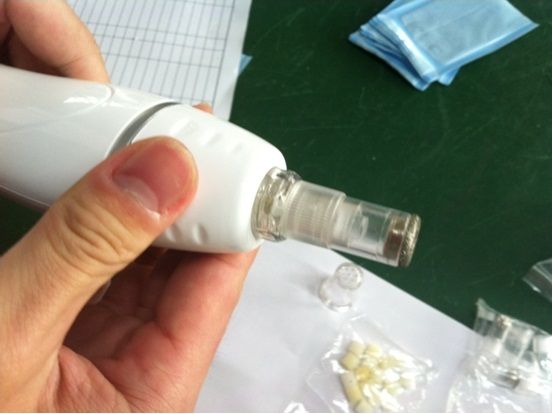
Step 10: If you don't use it, put the cap to protect the
diamond tip.
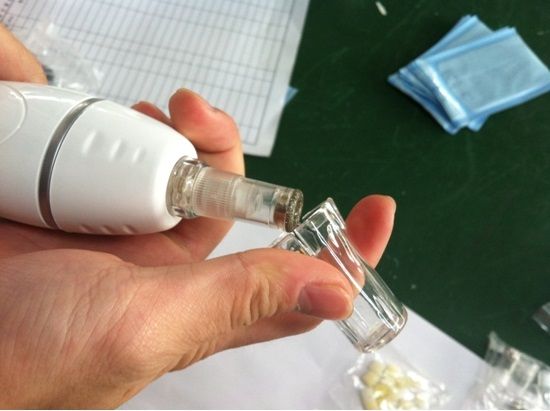
2. Operation instruction of diamond microdermabrasion
For video instruction of diamond
microdermabrasion, please go to youtube.com and search keyword "diamond microdermabrasion", you may find some useful videos.
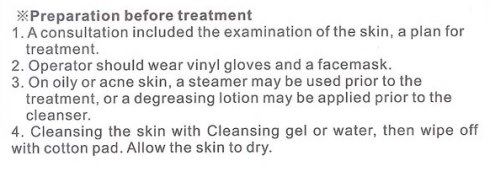
Operation instruction:
·
Put the plug into the power socket
and turn on the power button.
·
Push the vacuum intensity level from
minimum to maximum and choose the proper strength level.
·
Place the diamond head on skin
surface (start from forehead), proceed with a slow sliding motion. Do not leave
the diamond tip at one spot for too long, doing so will cause harm to the skin.
·
Gently stretch the skin with thumb
and finger and glide the hand-piece 2to 3 times over the area being treated.
Then cross again in different directions to prevent streaking lines as in the
reference picture. Brush strokes or polishing motions may be used in different
sites. (See picture 2 below --diagram of suggested movements and areas).
·
After treatment, brush off all
remaining dead skin with a soft brush and rinse with damp sponges or damp cool
towel.
·
Allow skin to dry then apply
desired skin product.
·
To clean the diamond head, use
toothbrush or cotton swab damped with a little alcohol to wipe off the dirty
impurity, and then use UV light or high temperature for sterilization.
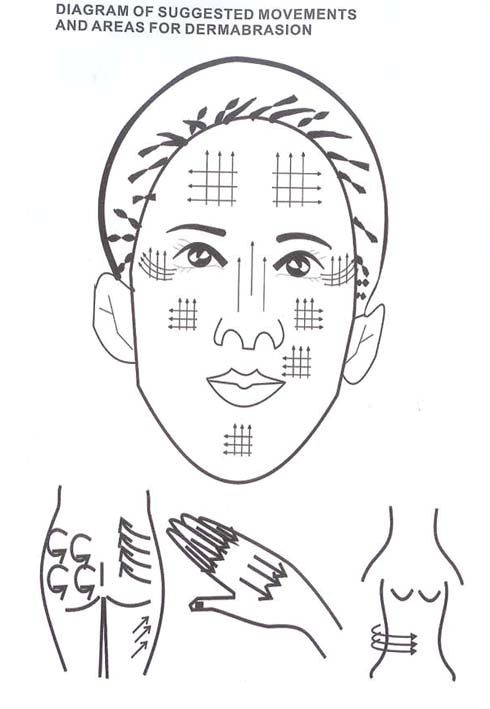
Picture 2

3. Operation instruction of vacuum use
There are 3 ventouse for vacuum suction.
Connect the ventouse in the same way as the diamond tips as shown above.
For video instruction of facial vacuum
suction, please go to youtube.com and search keyword "vacuum suction facial",
you may find some useful videos.
4.
Safety Warning:
Never operate this equipment on a person that suffers form
the following:
a.
Heart Disease
b.
Sensitive skin
c.
Damaged skin
d.
Inflamed skin
e.
Infected skin
Do not use on the following areas:
a.
Sensitive skin
b.
Skin rash
c.
Damaged, inflamed,
or infected skin
d.
Surgical scar that
is less than 12 months old
e.
Swollen skin
f.
The probes should
not point directly towards the eyeball
g.
Do not use on the
genitals
5. Contact information:
Should you have any questions
about this machine, please send e-mail to New Shining Image LLC at service@shiningimageinc.com


